Content Stages
A Content Stage is a set of tasks that are used as a template and are added to the Workflow tab in Content Types and Workflow (optional) so that the tasks are tied to the workflow when a content asset is created with the applied content type. You can also track the movement of each task in the stage and customize the tasks.
Note:
-
Only Admins can create content stages.
-
Content Stages can also be added to the workflow in a content asset, refer to Adding Content Stages to a Content Asset.
To learn more about Content Stages, refer to Stages vs Statuses.
Creating a Content Stage
To create a new content stage, navigate to ![]() > Content Stages.
> Content Stages.
-
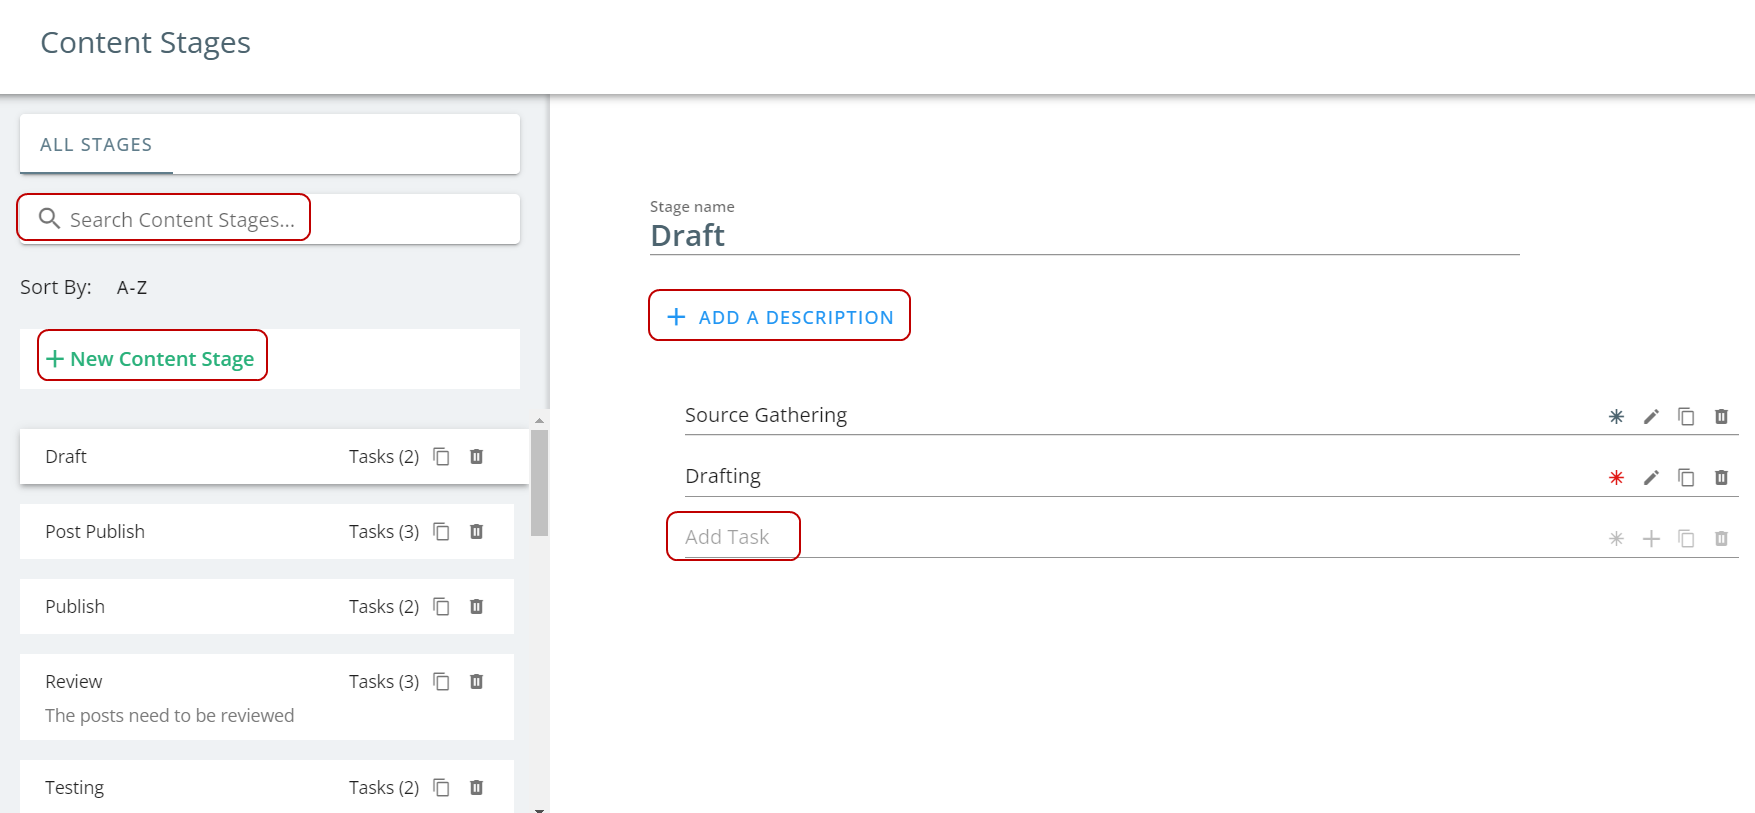
Click + New Content Stage green button on the left panel.
-
Click on the Stage Name field to add a name for the stage and click anywhere outside the Stage Name field to create the Content Stage.
You will see a message that says "Stage Created" with a green tick mark.
Note: The Content Stage must have a name before any tasks can be added.

-
Click + Add a description button to enter a brief description of the stage.
-
Click on the Add Task field and enter the task name.
Note: You can add multiple tasks by clicking on the Add Task fields below.
-
You can perform the following functions for each task:
-
 - Make this task as a required task. Without marking this task as Complete, you cannot proceed to the next task.
 -
 - Edit the task.
Note: You can only add Assignee(s) and description. You can add deadlines and task rules after applying the content stage to a content type.
-
 - Duplicate the task.
 -
 - Delete the task.
-
-
To reorder the tasks, hover on the task names and click on the
 icon to drag and drop the task in the desired order.
 -
Once you enter all the tasks, the Content Stage is automatically updated and saved.
Note:
-
To apply the Content Stage to a Content Type (Optional), refer to Content Types and Workflow Settings.
-
If users update a Content Stage associated with a Content Type, they must update the content type as well in order to display the updated stage details.
How to Search Content Stages
The existing content stages can be searched in the following ways:
-
Scroll down the list of content stages
-
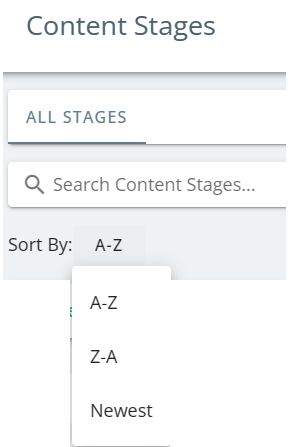
Search by name in the Search Content Stages field
-
Sort by A-Z, Z-A or Newest
Deleting a Content Stage
To delete an existing Content Stage:
-
Search the content stage you want to delete and click on the
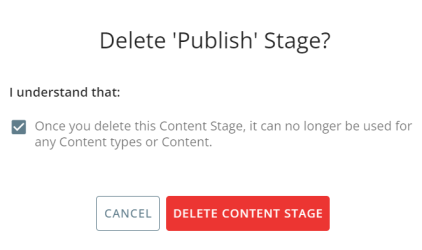
icon.A confirmation pop-up window opens.
-
Click on the Delete Content Stage button on the confirmation pop-up window.
-
If you delete a Content Stage that is used on at least one Content type, then it can no longer be used for any Content types or Content. However, the Stage will still be visible on all Content types or Content where it has already been applied. If you want to remove them from Content types, then you must delete the Stage from the Content Types page.
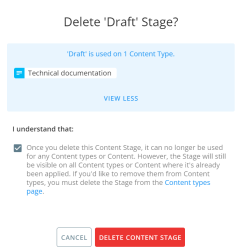
Tip: View More button lets you view which Content Type is being used for the Content Stage.


To filter by content stage, refer to Filtering by Content Stages.